Hello, Umbraco Management API
The first release candidate of Umbraco 15 was released today ✨
Among other things, Umbraco 15 brings about exciting news for building integrations with Umbraco: Server-to-server access to the Management API using Client Credentials!
The Management API? 🤔
The Management API powers the entire backoffice of Umbraco 14+. Anything you can do in the backoffice, can also be done using the API 🚀
It’s a REST API with an OpenAPI specification on top, which is accessible through Swagger UI at /umbraco/swagger for easy tinkering and testing.
The Management API is fully extendable; you can build your own APIs, which will then also be available for consumption with Client Credentials.
A new user type
To facilitate Client Credentials authentication, Umbraco 15 introduces a new type of backoffice user: The API user 🤖
For all intents and purposes, an API user is identical to a regular backoffice user, only it has no password and thus cannot log into the backoffice. Instead, the API user can hold several sets of Client Credentials:
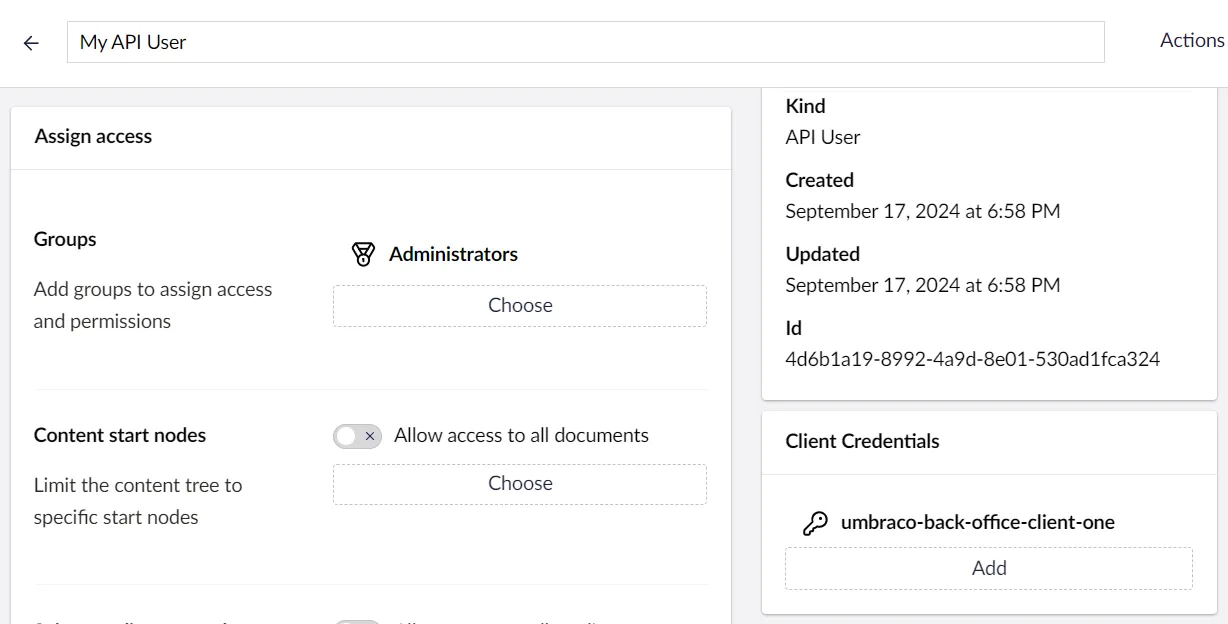
When a Management API consumer uses one of these for authentication, the consumer efficiently ends up impersonating the API user. That’s pretty clever, because consumer permissions can then be scoped exactly like regular user permissions 🔒
Consuming the Management API
The Management API can be applied to a wealth of use cases. To demonstrate it, I have chosen to solve an automation task for Umbraco members 🤖
In this made-up case, members needs to be synchronized from a CRM system to an Umbraco based member portal. It’s a one-way synchronization which must support member creation, updates and deletion. Furthermore:
- Members at can have VIP status, which must be represented as assigned member groups in Umbraco.
- The automation must update the
lastSyncMessagetext property of a member whenever it is created or updated.
To avoid a tight coupling between the CRM and Umbraco, I’ll introduce a Broker service. Incidentally, this also lets me write the automation in Node.js, which is somewhat the point of this post 😉

In a real world scenario, the connection between the CRM and the Broker would likely be a message queue of some kind, both for resilience and further decoupling. However, to keep this example simple (and able to run without added infrastructure), I’ll build the Broker as an Express app with endpoints for each operation.
In the following there will be a bunch of code. If you want to try it out yourself, you can clone it down from this GitHub repo.
Authenticating the broker
The Management API uses the standard OpenId Connect Client Credentials flow. This means that any OpenId Connect enabled platform can integrate directly with Umbraco.
In my implementation I’ll use the npm package openid-client to do the heavy lifting authentication wise.
import {Issuer} from 'openid-client';

const issuer = new Issuer({
    issuer: process.env.UMBRACO_HOST,
    token_endpoint: `${process.env.UMBRACO_HOST}umbraco/management/api/v1/security/back-office/token`
});

const client = new issuer.Client({
    client_id: process.env.UMBRACO_CLIENT_ID,
    client_secret: process.env.UMBRACO_CLIENT_SECRET,
});

let tokenSet = null;

async function getAccessToken() {
    if (!tokenSet || tokenSet.expired()) {
        tokenSet = await client.grant({
            grant_type: 'client_credentials'
        });
        console.info('The token set was updated:', tokenSet);
    }

    return tokenSet.access_token;
}
As you can probably tell from the code, access tokens have a set lifespan, after which they are revoked by the server. The code automatically obtains a new access token when needed.
Creating a member
With the access token in place, it’s time to consume the Management API.
According to the OpenAPI spec, member creation requires a POST to the /member endpoint. Sounds reasonable 👍
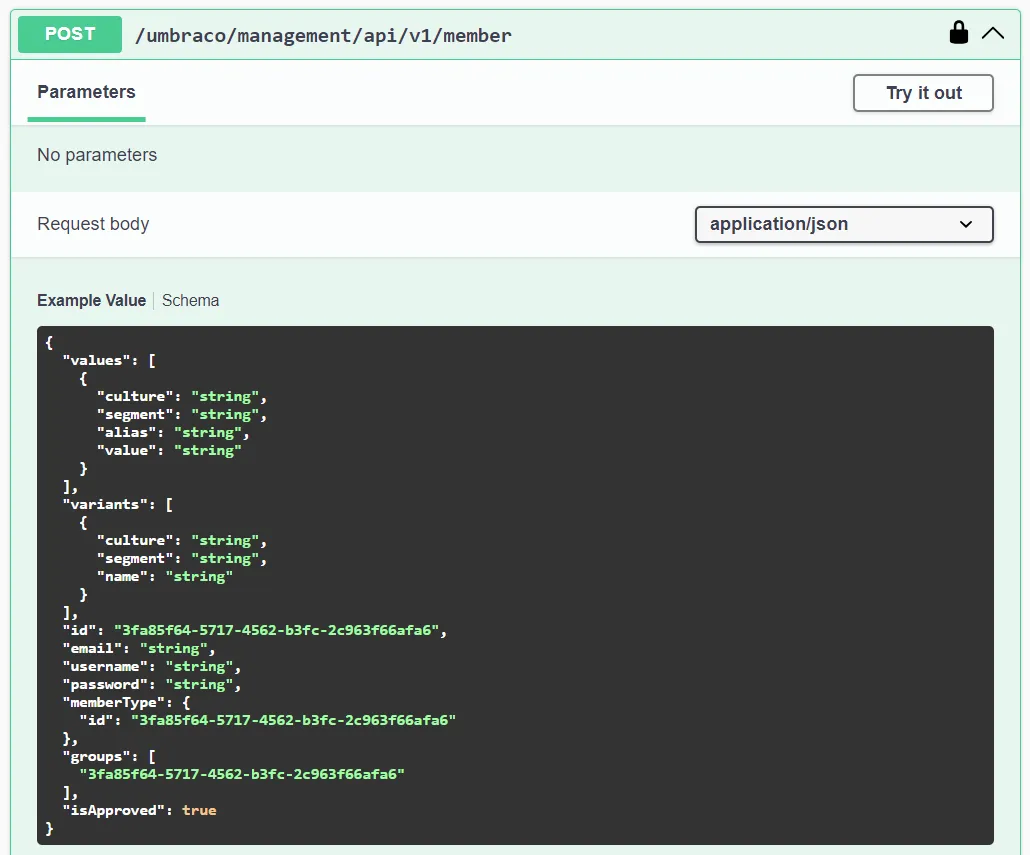
I’ll add a similar POST endpoint to the Broker, albeit with a much simpler request model that contains:
- The member ID.
- The member email.
- The member name.
- Whether the member is considered a VIP.
The Broker then converts this request model into the corresponding Management API request model to create the new member in Umbraco:
import express from 'express';
import {v4 as uuidV4} from 'uuid'

const app = express();

app.post('/member', async (req, res) => {
    const data = req.body;
    if (!data.email || !data.name || !data.memberId) {
        res.status(400).send('Malformed request body (missing required member properties)');
        return;
    }

    await createMember(data.memberId, data.name, data.email, data.isVip ?? false)
        .then(
            () => res.status(200).send(),
            (error) => res.status(error.code).send(error.description)
        );
});

const createMember = async (memberId, name, email, isVip) => new Promise(async (resolve, reject) => {
    await getMember(memberId).then(
        async (member) => {
            if (member !== null) {
                console.info(`Member with ID '${memberId}' already exists, aborting member creation.`)
                return reject({code: 409, description: 'Member already exists'});
            }

            const umbracoMember = umbracoMemberModel(memberId, name, email, isVip);
            // must set an initial password when creating a member
            umbracoMember.password = uuidV4();

            const accessToken = await getAccessToken();
            const response = await fetch(
                `${process.env.UMBRACO_HOST}umbraco/management/api/v1/member`,
                {
                    method: 'POST',
                    headers: {
                        'Authorization': `Bearer ${accessToken}`,
                        'Content-Type': 'application/json'
                    },
                    body: JSON.stringify(umbracoMember)
                }
            );

            if (response.ok) {
                console.info(`Member with ID '${memberId}' was successfully created.`);
                resolve(true);
            } else {
                const errorDetails = await response.json();
                console.error(`Could not create member with ID '${memberId}':`, errorDetails);
                reject({code: response.status, description: response.statusText});
            }
        },
        (error) => reject(error)
    )
});

const umbracoMemberModel = (memberId, name, email, isVip) => {
    // VIP members should have an extra group membership in Umbraco
    const groupIds = isVip
        ? [process.env.UMBRACO_MEMBER_GROUP_REGULAR_ID, process.env.UMBRACO_MEMBER_GROUP_VIP_ID]
        : [process.env.UMBRACO_MEMBER_GROUP_REGULAR_ID];

    return {
        email: email,
        username: memberId,
        memberType: {
            id: process.env.UMBRACO_MEMBER_TYPE_ID
        },
        isApproved: true,
        groups: groupIds,
        values: [{
            culture: null,
            segment: null,
            alias: "lastSyncMessage",
            value: `Last update: ${(new Date()).toUTCString()}`
        }],
        variants: [
            {
                culture: null,
                segment: null,
                name: name
            }
        ]
    };
}
There is a subtle but important thing to notice here: The resulting Umbraco member will use their CRM member ID as username when logging into the member portal.
This is quite convenient, because now the Broker can use the member ID to perform a member lookup through the Management API:
const getMember = async (memberId) => new Promise(async (resolve, reject) => {
    const accessToken = await getAccessToken();

    const response = await fetch(
        `${process.env.UMBRACO_HOST}umbraco/management/api/v1/filter/member?filter=${memberId}&take=1`,
        {
            method: 'GET',
            headers: {
                'Authorization': `Bearer ${accessToken}`,
                'Accept': 'application/json'
            }
        }
    );

    if (response.ok) {
        const result = await response.json();
        if (result.total === 0) {
            resolve(null);
            return;
        }

        const item = result.items[0];
        resolve({
            id: item.id,
            email: item.email,
            memberId: item.username,
            name: item.variants[0].name
        });
    } else {
        const errorDetails = response.bodyUsed
            ? await response.json()
            : response.statusText;
        console.error(`Could not get member with ID '${memberId}':`, errorDetails);
        reject({code: response.status, description: response.statusText});
    }
});
You might have noticed the environment variables for various IDs in the previous code snippets. These could just as well have been fetched from the Management API during start-up, but I have chosen to define them as environment variables because:
- It makes the whole example less cluttered and more to the point.
- It allows the Broker to start up even if Umbraco for whatever reason should be unavailable.
- The IDs are extremely unlikely to change over the course of the application lifetime, so fetching them over and over becomes academic exercise more than a practical purpose.
Updating a member
Turning back to the OpenAPI spec, a member update is a PUT to the /member/{id} endpoint, where {id} is the Umbraco ID of the member:
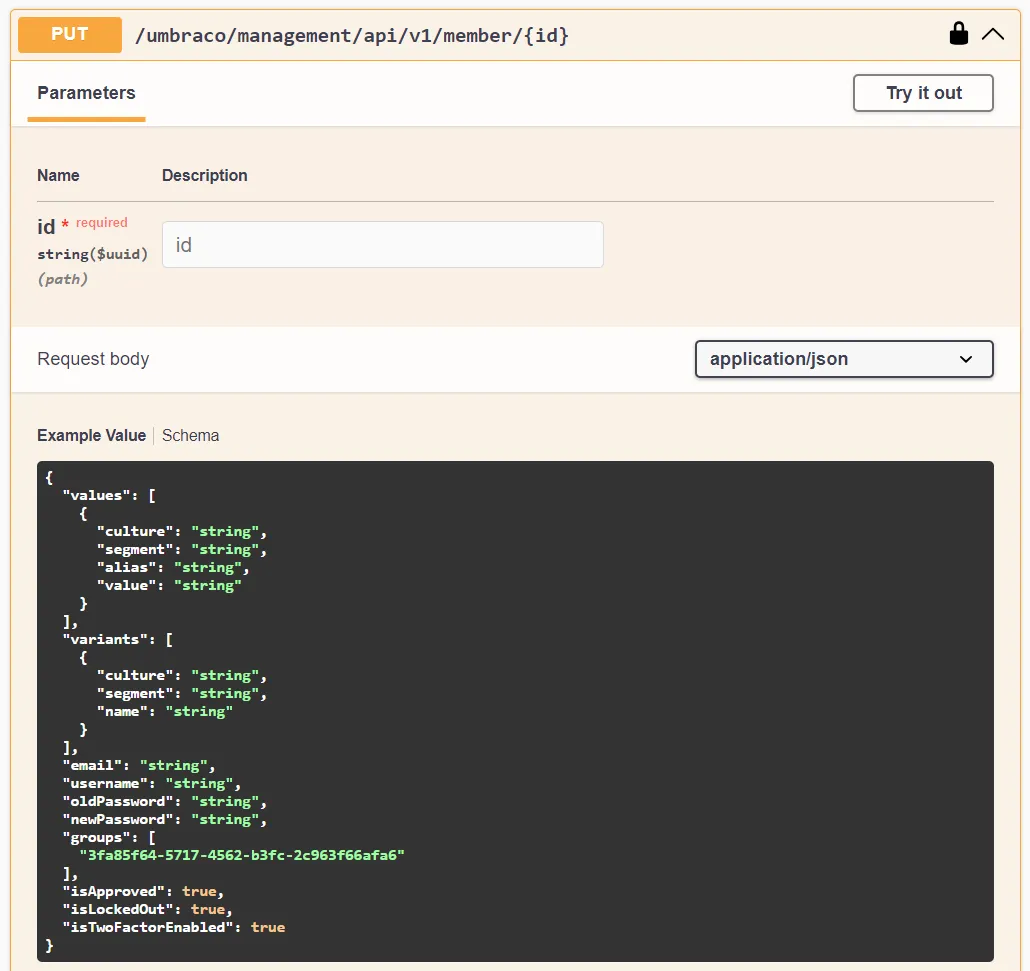
Once more I’ll match that with a PUT endpoint in the Broker. I’ll capitalize on the fact that the CRM member ID can be used to fetch the corresponding Umbraco member, which in turn contains the Umbraco ID of the member resource to update:
app.put('/member/:memberId', async (req, res) => {
    const data = req.body;
    if (!data.email || !data.name) {
        res.status(400).send('Malformed request body (missing required member properties)');
        return;
    }

    await updateMember(req.params.memberId, data.name, data.email, data.isVip ?? false)
        .then(
            () => res.status(200).send(),
            (error) => res.status(error.code).send(error.description)
        );
});

const updateMember = async (memberId, name, email, isVip) => new Promise(async (resolve, reject) => {
    await getMember(memberId).then(
        async (member) => {
            if (member === null) {
                console.info(`Member with ID '${memberId}' did not exist, aborting member update.`)
                return reject({code: 404, description: "No such member"});
            }

            const umbracoMember = umbracoMemberModel(memberId, name, email, isVip);

            const accessToken = await getAccessToken();
            const response = await fetch(
                `${process.env.UMBRACO_HOST}umbraco/management/api/v1/member/${member.id}`,
                {
                    method: 'PUT',
                    headers: {
                        'Authorization': `Bearer ${accessToken}`,
                        'Content-Type': 'application/json'
                    },
                    body: JSON.stringify(umbracoMember)
                }
            );

            if (response.ok) {
                console.info(`Member with ID '${memberId}' was successfully updated.`);
                resolve(true);
            } else {
                const errorDetails = await response.json();
                console.error(`Could not update member with ID '${memberId}':`, errorDetails);
                reject({code: response.status, description: response.statusText});
            }
        },
        (error) => reject(error)
    )
});
Deleting a member
Once again, here’s what the OpenAPI spec has to say about deleting a member through the Management API:
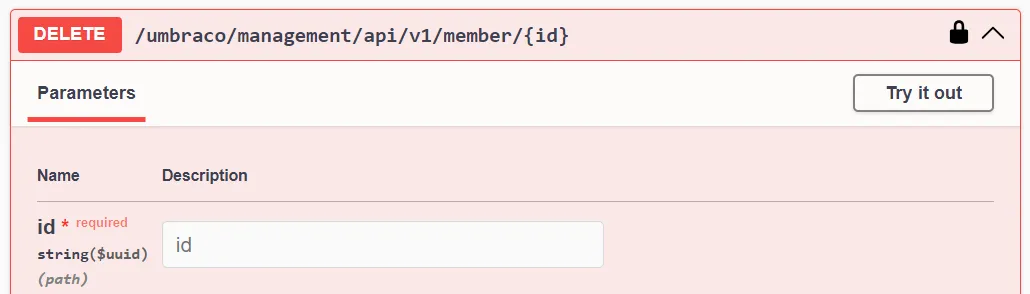
Well, that’s simple. But then again, it’s a REST API… resource deletion should be straight-forward.
The corresponding Broker implementation looks like this:
app.delete('/member/:memberId', async (req, res) => {
    await deleteMember(req.params.memberId)
        .then(
            () => res.status(200).send(),
            (error) => res.status(error.code).send(error.description)
        );
});

const deleteMember = async (memberId) => new Promise(async (resolve, reject) => {
    await getMember(memberId).then(
        async (member) => {
            if (member === null) {
                console.info(`Member with ID '${memberId}' did not exist, aborting member deletion.`);
                return reject({code: 404, description: "No such member"});
            }

            const accessToken = await getAccessToken();
            const response = await fetch(
                `${process.env.UMBRACO_HOST}umbraco/management/api/v1/member/${member.id}`,
                {
                    method: 'DELETE',
                    headers: {
                        'Authorization': `Bearer ${accessToken}`
                    }
                }
            );

            if (response.ok) {
                console.info(`Member with ID '${memberId}' was successfully deleted.`);
                resolve(true);
            } else {
                const errorDetails = await response.json();
                console.error(`Could not delete member with ID '${memberId}':`, errorDetails);
                reject({code: response.status, description: response.statusText});
            }
        },
        (error) => reject(error)
    )
});
Testing time 🧪
That was a lot of code 😅 now it’s time to put it to the test!
Assuming you’ve cloned down the GitHub repo, first open a terminal in /src/Broker and start the Broker by running:
npm install
npm run broker
Next, open another terminal in /src/Server and start Umbraco by running dotnet run. You can log into the Umbraco backoffice with these credentials:
- Username: admin@localhost
- Password: SuperSecret123
Once both are running, fire up your favourite API testing tool to execute commands against the Broker.
Creating a member
The create command looks like this:
POST http://localhost:3000/member
Content-Type: application/json
{
    "memberId": "m123456789",
    "email": "member-email@local",
    "name": "Member Name",
    "isVip": false
}
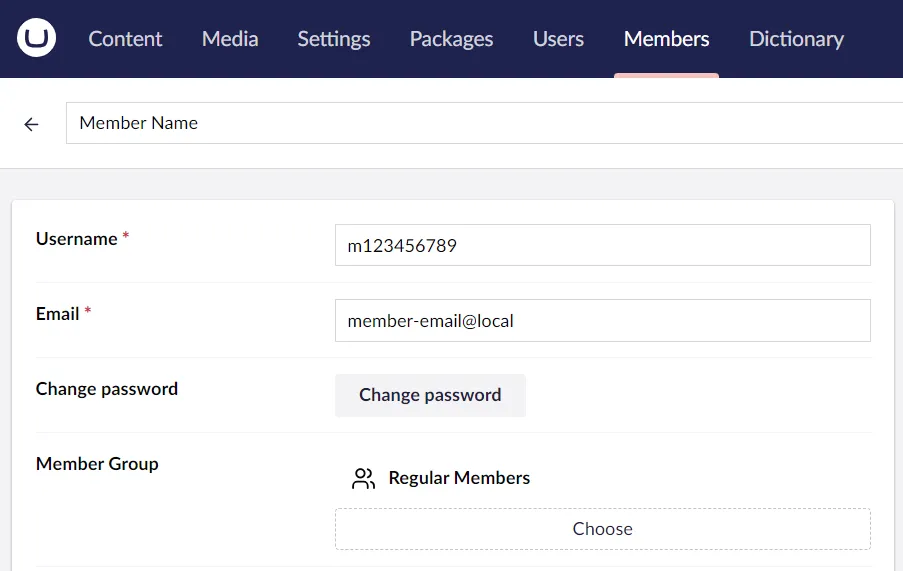
…and yields a new Umbraco member:
Updating a member
The update command looks like this:
PUT http://localhost:3000/member/m123456789
Content-Type: application/json
{
    "email": "updated-member-email@local",
    "name": "Updated Member Name",
    "isVip": true
}
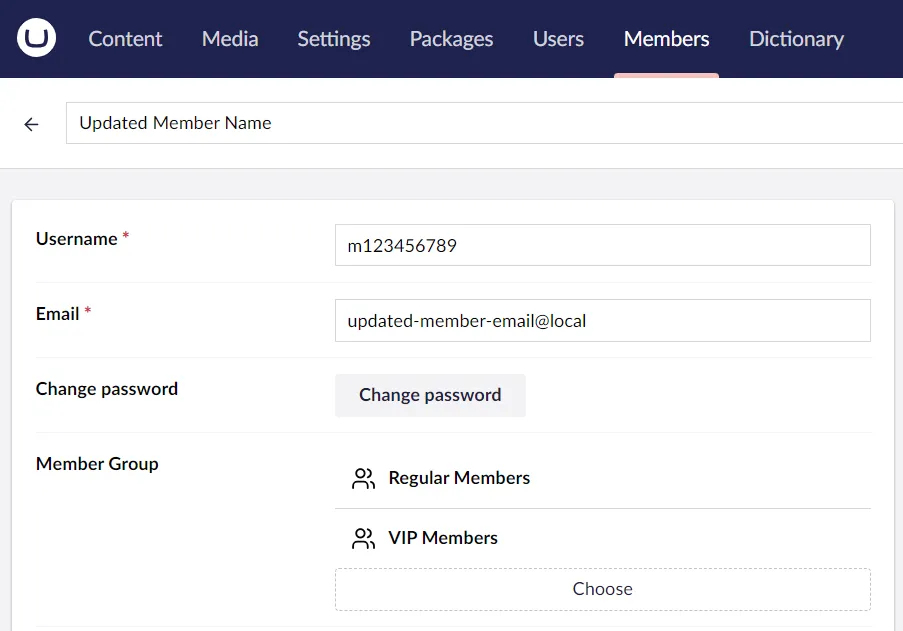
…and yields an update of the newly created Umbraco member:
Deleting a member
Lastly, the delete command looks like this:
DELETE http://localhost:3000/member/m123456789
The Management API rocks 🤘
Or - at least I think so 😄
It’s pretty awesome to finally have an out-of-the-box integration API with managed authentication for Umbraco. No more home-brewed auth schemes!
It’s also darn neat to be able to build integrations in other languages than C#. Don’t get me wrong, I’m a huge C# and .NET fan, but the Management API just makes Umbraco integrations so much more accessible for everyone 🫶
The code in this post is purposely written quite verbose. Hopefully this makes the examples easier to follow. Consider refactoring some of it, if you ever put it to use; particularly the Management API request code can be boiled down quite a bit.
Also… I’m weirdly excited to see how y’all will put the Management API to use in the future 😊
Happy integrating 💜