Protecting content with Umbraco Delivery API

Since Umbraco 12.3, the Delivery API has allowed us to restrict access to specific content items, while retaining public access to the rest. This feature is known as “Protected content in the Delivery API”.
Keeping up with best practices, the Umbraco Delivery API applies the recommended OpenID Connect flow Authorization Code Flow + Proof Key of Code Exchange (PKCE). This however requires a somewhat complicated setup to run. Auth isn’t easy!
The process of setting things up is documented step by step in the official documentation (link above). However, a working demo sometimes aids the understanding and helps you get started, so I have created just that. It’s all in this GitHub repo.
When reading this post, keep in mind that the Umbraco uses the term “members” for website end-users 😄
The demo consists of a server and a client project - src/Server and src/Client respectively. In the following I’ll walk you through the details.
The server
The server is an Umbraco 13 site, which means you’ll need .NET 8 to run it. To start the server, open a terminal window in src/Server and run:
dotnet run
The Umbraco database is bundled up as part of the GitHub repo, so the site should “just run” without any fuss.
To facilitate member auth in the Delivery API, the AuthorizationCodeFlow is enabled in appsettings.json, and appropriate login and logout redirect URLs are defined for the client.
You’ll need to login to play around with the Umbraco content. The administrator login for Umbraco is:
- Username: admin@localhost
- Password: SuperSecret123
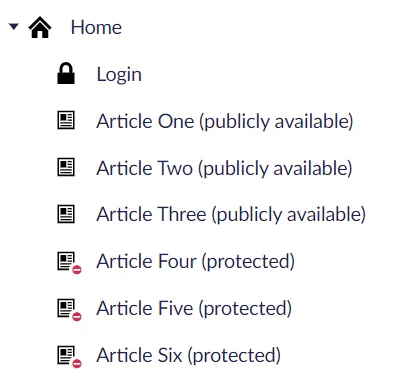
The Umbraco content features:
- A set of articles. Some of these are publicly available and some are protected. The articles don’t actually have any content, because content is not the purpose of the demo.
- A login page. For the sake of the demo, a valid set of member credentials is hardcoded here.
By means of composition, the Umbraco site has:
- CORS enabled for the client.
- A custom path for the login page.
- Member auth support in the Swagger docs.
All composers can be found in the src/Server/Configuration folder.
The client
The client is a React app. The server must be running for the client to work. To start the client, open a terminal window in src/Client and run:
npm install
npm start
The client uses AppAuth for JS to handle the authorization flow complexity, and performs automatic discovery of the server OpenId configuration.
The client also showcases a complete logout flow, which is actually a two-part process if you want to terminate the member session completely:
- Revoke the auth token issued by the server. This is done using built-in mechanisms in AppAuth.
- Perform an explicit sign-out on the server. This can only be done on the actual server, as it involves clearing server bound state. In other words, the client needs to perform a full redirect to the server, which in turn redirects back to the client after the sign-out is completed.
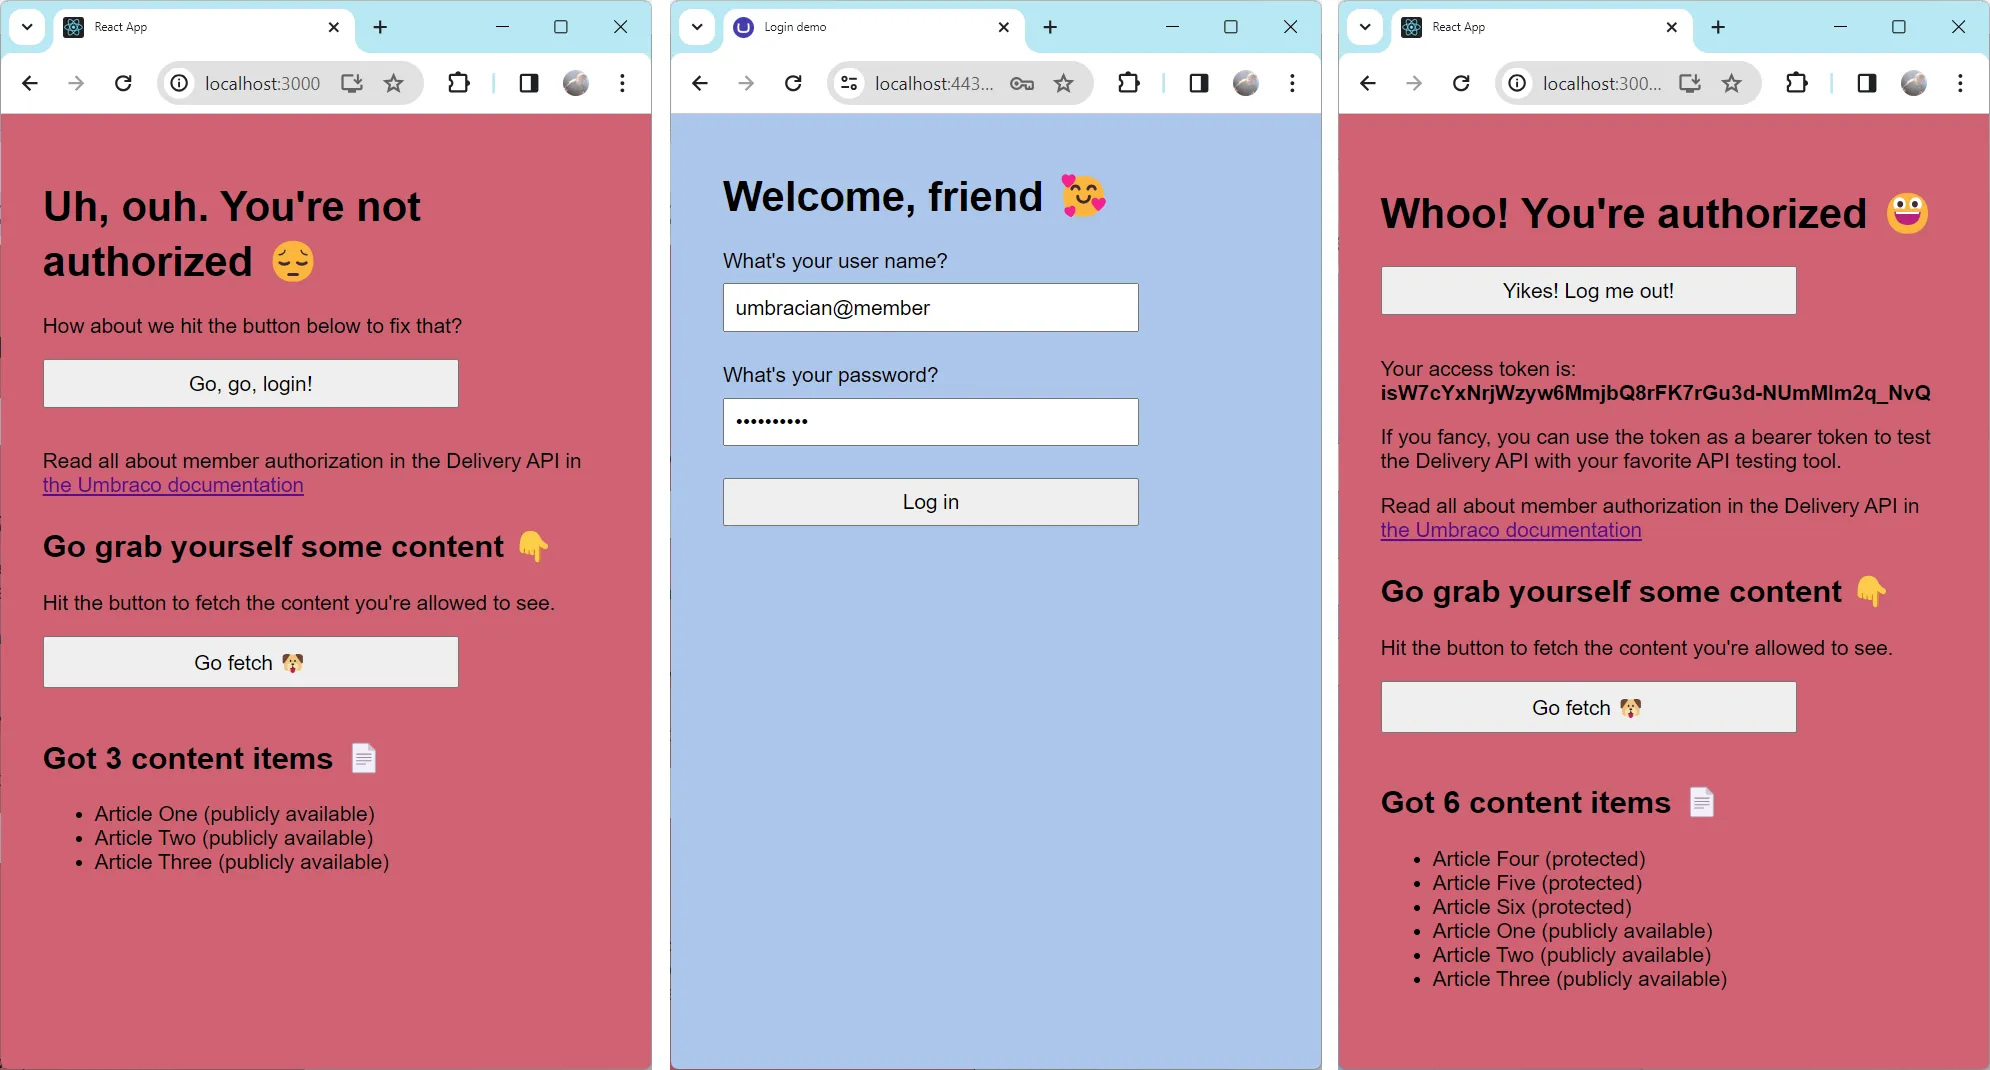
To keep the client as simple as possible, it consists of a single component called App. This however has a few backdraws in the demo:
- The client flickers between authentication states when it reloads after a successful auth flow.
- The obtained access token is kept in memory, thus lost on reload.
- There seems to be no way to figure out when the authentication flow is truly finished. Incidentally, this is why there is a button to fetch content from the Delivery API manually rather than doing it automatically on load :smile:
In all likelihood, someone with better frontend skills than yours truly might be able handle these things better 😆 In a real life scenario, the client would likely have a dedicated component to handle the auth flow “callback” (see below), and store the access token in local storage.
The authorization flow
The Umbraco Delivery API uses the OpenID Connect flow Authorization Code Flow + Proof Key of Code Exchange (PKCE) when performing member auth.
This is a complex flow that involves a fair bit of back-and-forth between the client and the server. A crucial point of this flow is that the client never knows about the member credentials - these should only be known to the server (or any third party authentication providers).
The flow goes something like this:
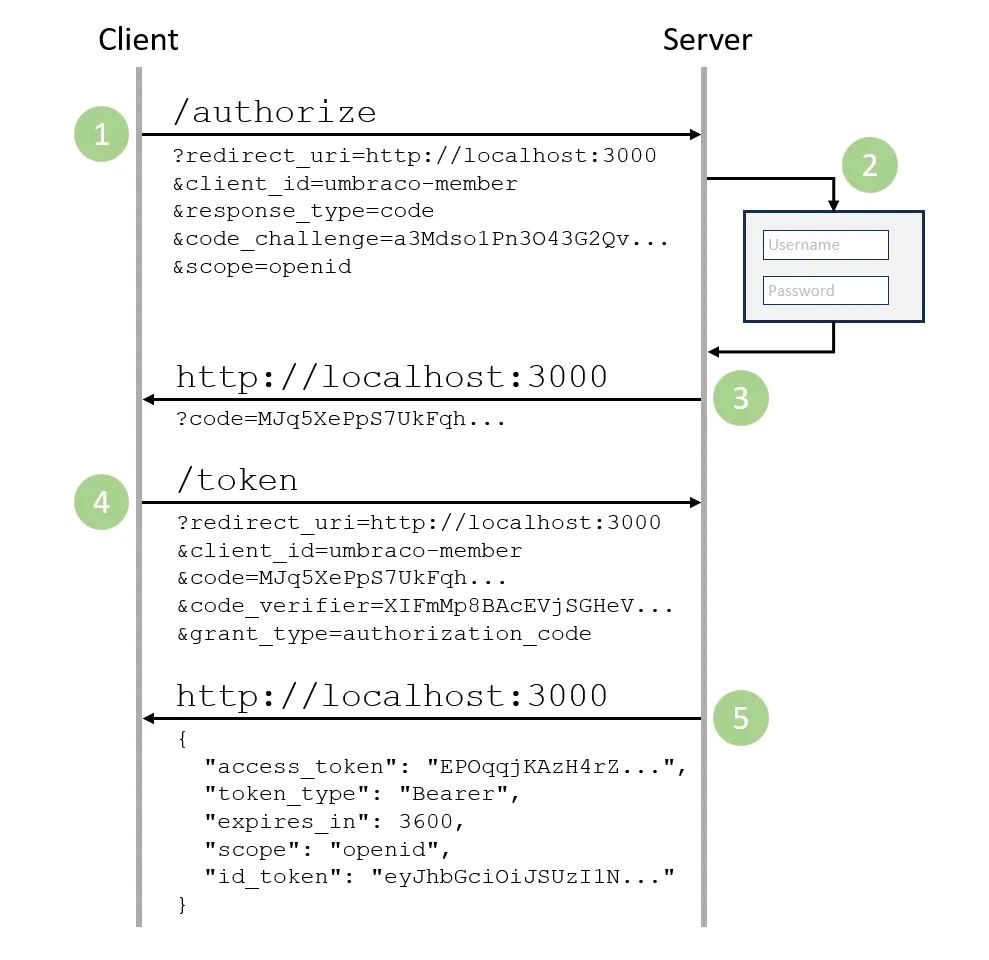
- The client requests the
authorizeendpoint to initiate the flow. Among other things, this request must contain a valid return URL and a code challenge. - The server performs the authentication, usually by means of a login screen, but it could also be forwarding the request to a third party authentication provider. Subsequently it authorizes the “scope” of the initial client authorization request.
- The server performs a callback request to the client return URL. This callback contains a code.
- The client requests an access token from the
tokenendpoint. Among other things, this request must contain the original redirect URL, the code from the server and a code verifier (which was initially used to generate the code challenge). These parameters are used by the server to validate thetokenrequest, and to ensure that it originates from the same client that initially sent theauthorizerequest. - The
authorizerequest yields an access token (among other things), which can be used as a bearer token in subsequent requests to the API.