Environments with Cloudflare Access

Managing multiple environments is a necessity for maintaining any kind of mature development process. And quite often, even the non-production environments must be accessible from “the outside” - e.g.:
- The QA environment for testing and signing off on feature completion before production releases.
- Feature environments for cooperation on long-running features.
- …you name it.
Obviously, non-production environments should not be publicly available.
In the previous blog post I explored setting up a dedicated preview environment for the cafe demo site. I also rambled and hinted a bit about protecting preview environments from unauthorized visitors using Cloudflare Access. In this post I will elaborate on that 😊
Cloudflare Access?
Cloudflare Access is a ZTNA and a part of the Cloudflare Zero Trust, which is a quite potent SASE platform.
Once you know what to do, the process of setting up protection for Cloudflare Pages is pretty straight-forward. But if I’m honest, I found the documentation somewhat lacking when trying this whole thing out - sometimes even referencing a seemingly older version of Cloudflare Access.
All the same, the end result is pretty darn neat, so let’s dive right in 🤿
Gettin’ jiggy wit it
Without further ado, here are the steps I had to take to set it all up.
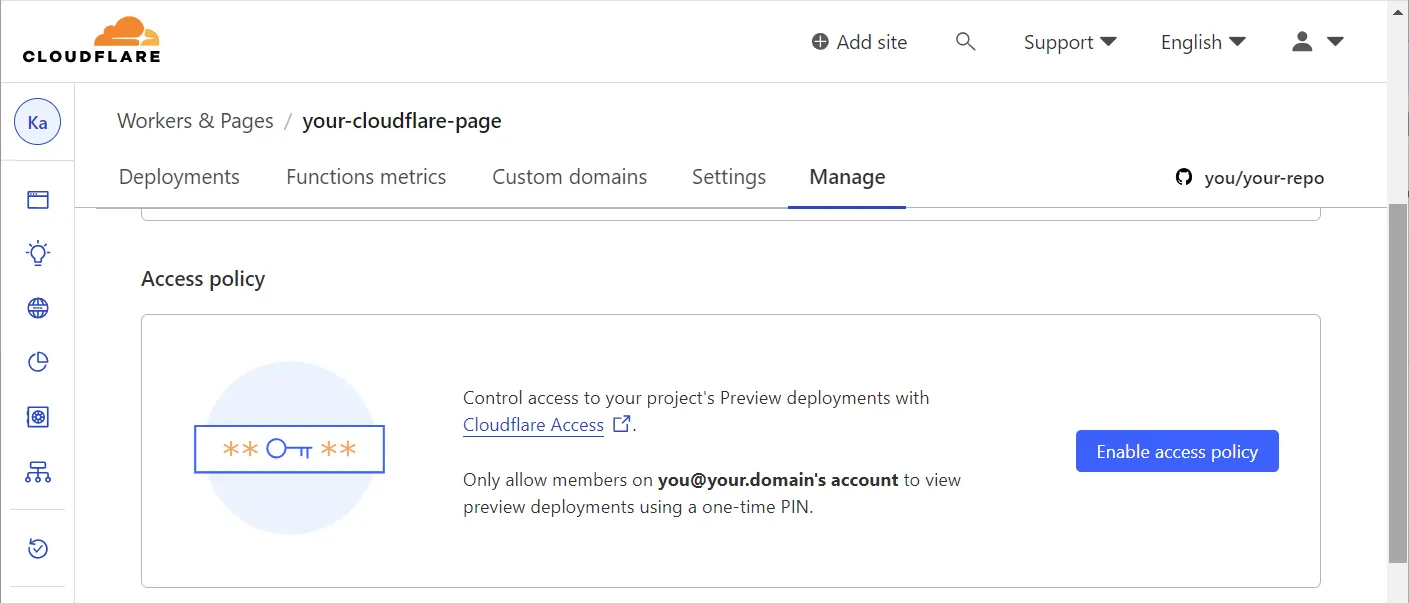
👣 Step 1: Enable Cloudflare Access for the Cloudflare Page
In the “Manage” section of your Cloudflare Page, locate “Access policy” and hit “Enable access policy”:
👣 Step 2: Pick a plan
Depending on the age of your Cloudflare account, you may or may not be met by a somewhat cryptic message about being on an older version of something.
Bottom line, you need to sign up for a Cloudflare Zero Trust plan in order to use Cloudflare Access. A quite generous free tier is available, which should be more than sufficient for a small site, and certainly for the sake of this demo.
Once the sign-up is complete, all non-production environments of the Cloudflare Page are automatically protected against public access ✅
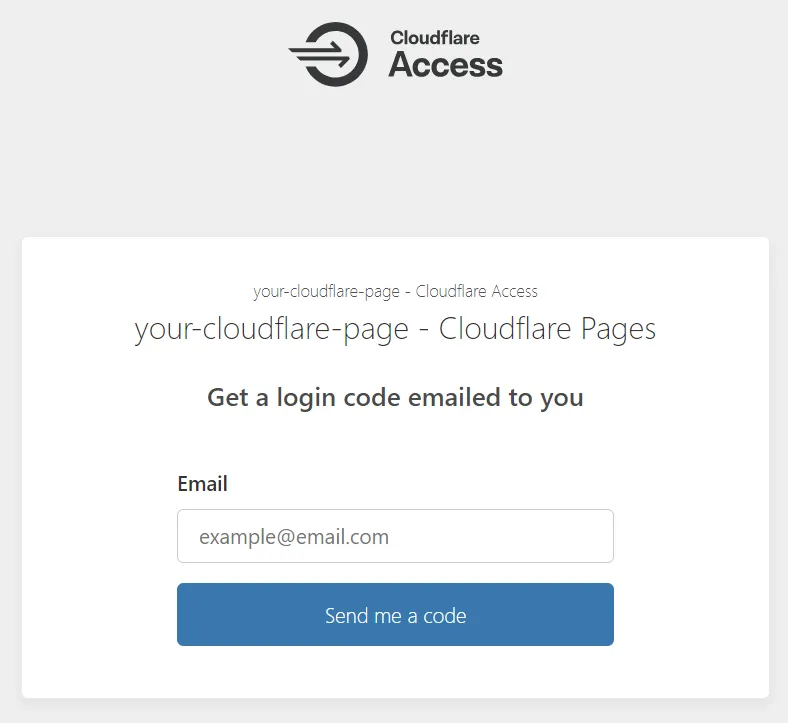
At this point, only the email address used by your Cloudflare account will be able to authenticate. Let’s change that.
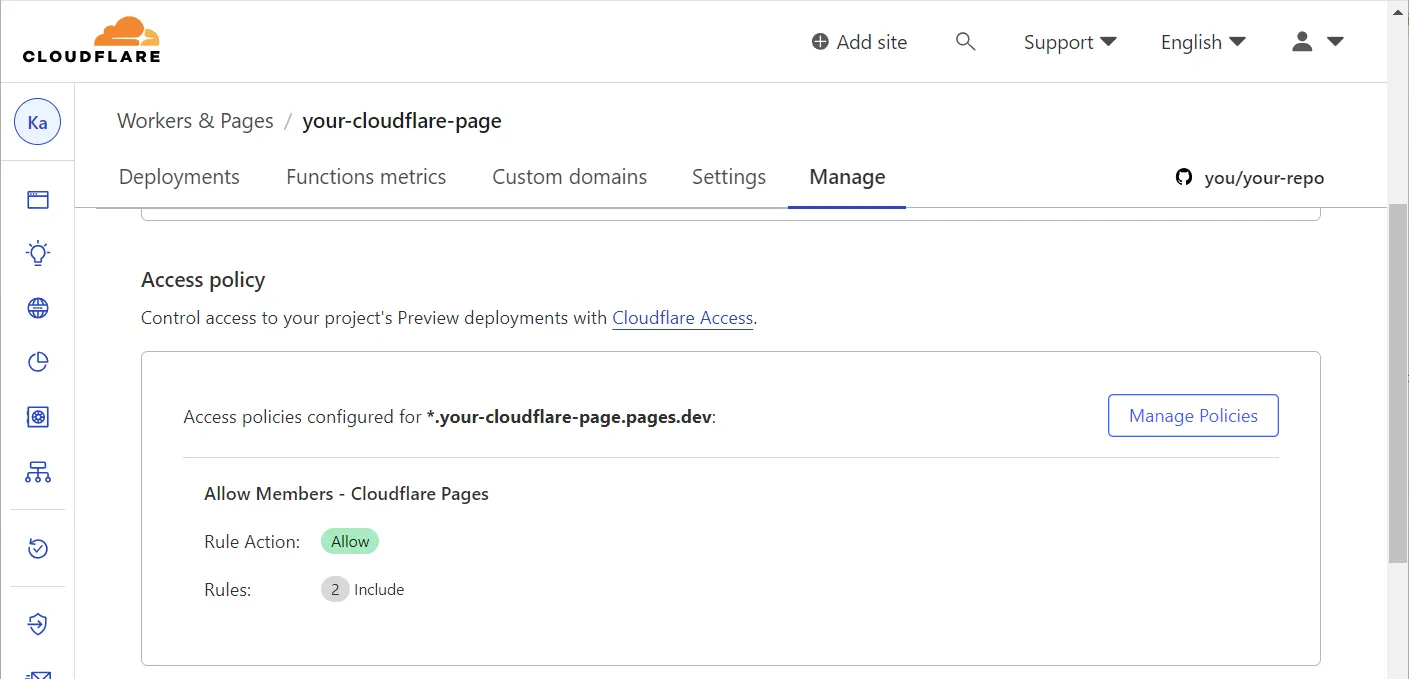
If you go back to the “Manage” section of the Cloudflare Page, it now contains a link to manage the access policies:
👣 Step 3: Locate the access policies
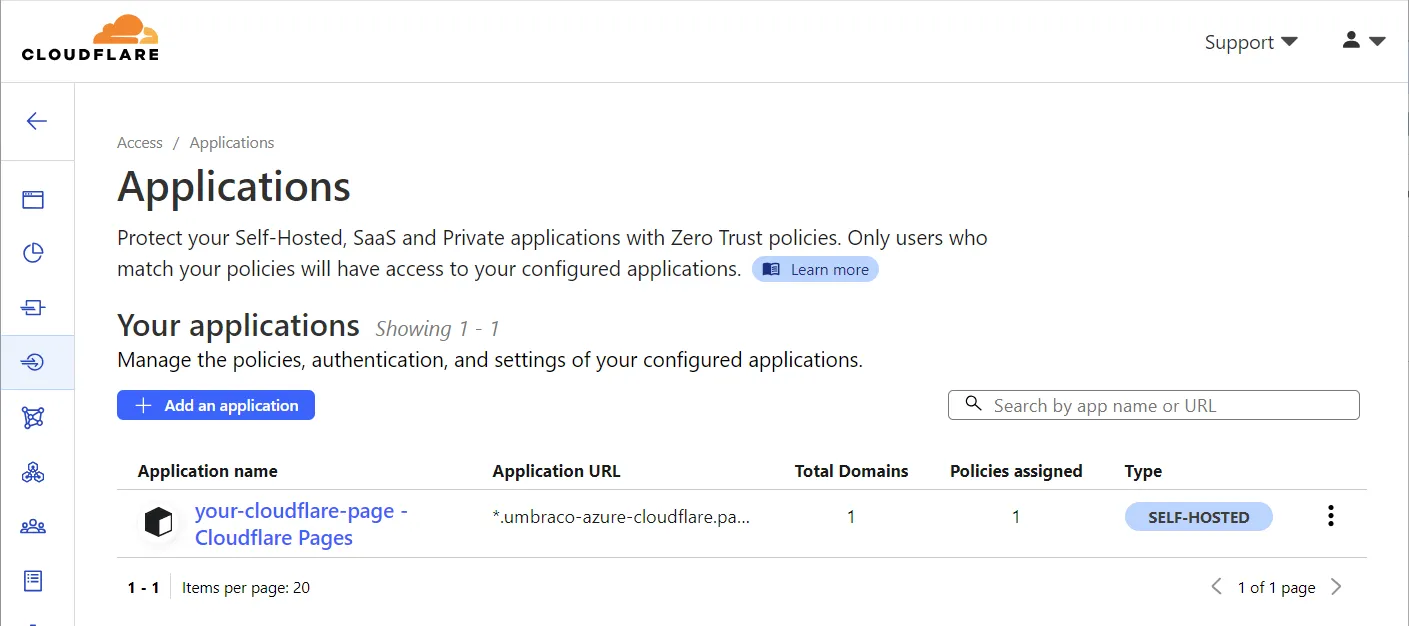
Clicking the link takes you to the applications overview in Cloudflare Access. You’ll find that an application has been created for the Cloudflare Page.
Click the three dots to the far right and pick “Configure”:
This brings up the application. At the time of writing you’ll be taken straight to the access policies. A default policy has already been created:
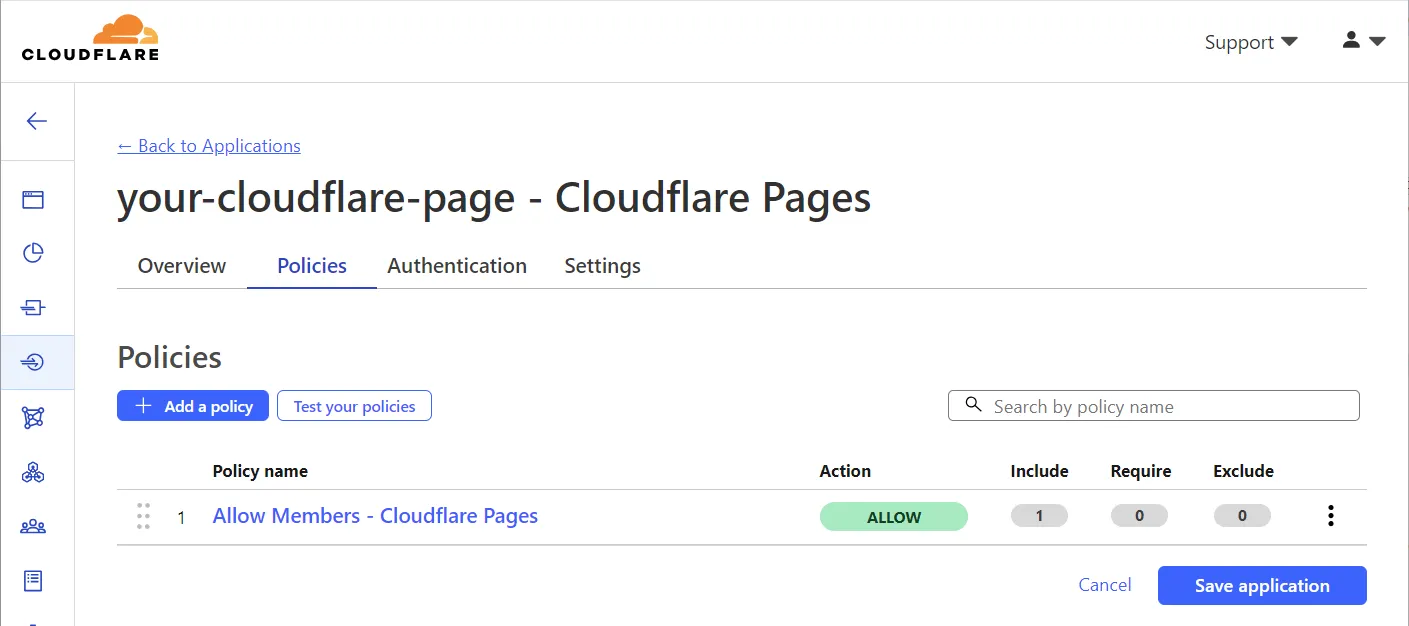
Click the three dots to the far right of the policy and pick “Configure” once more.
👣 Step 4: Configuring the policy
This brings up the policy configuration page. Your Cloudflare account email address will be listed in the “Include” selector, which is why you can authenticate with this email and access the preview environment.
Adding more authenticated users to the application is as simple as entering their email addresses in the “Value” field:
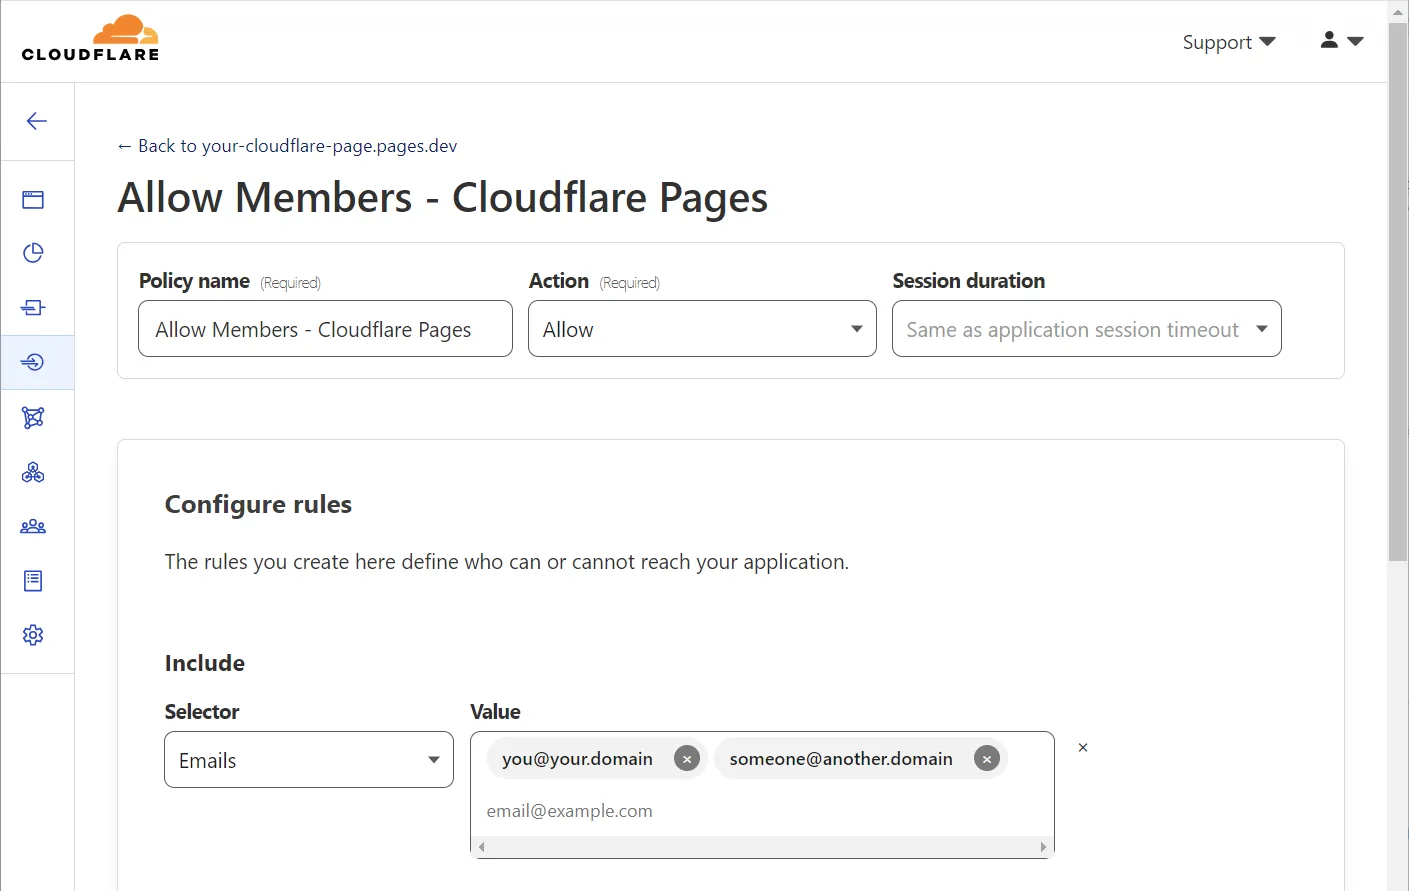
This may seem a little bare-bone at first glance. However, the rule setup for an access policy can combine a wealth of different parameters, and also include logical operators (AND, OR, NOT).
For example, if the end users are required to be within certain IP ranges, add a “Require” rule:
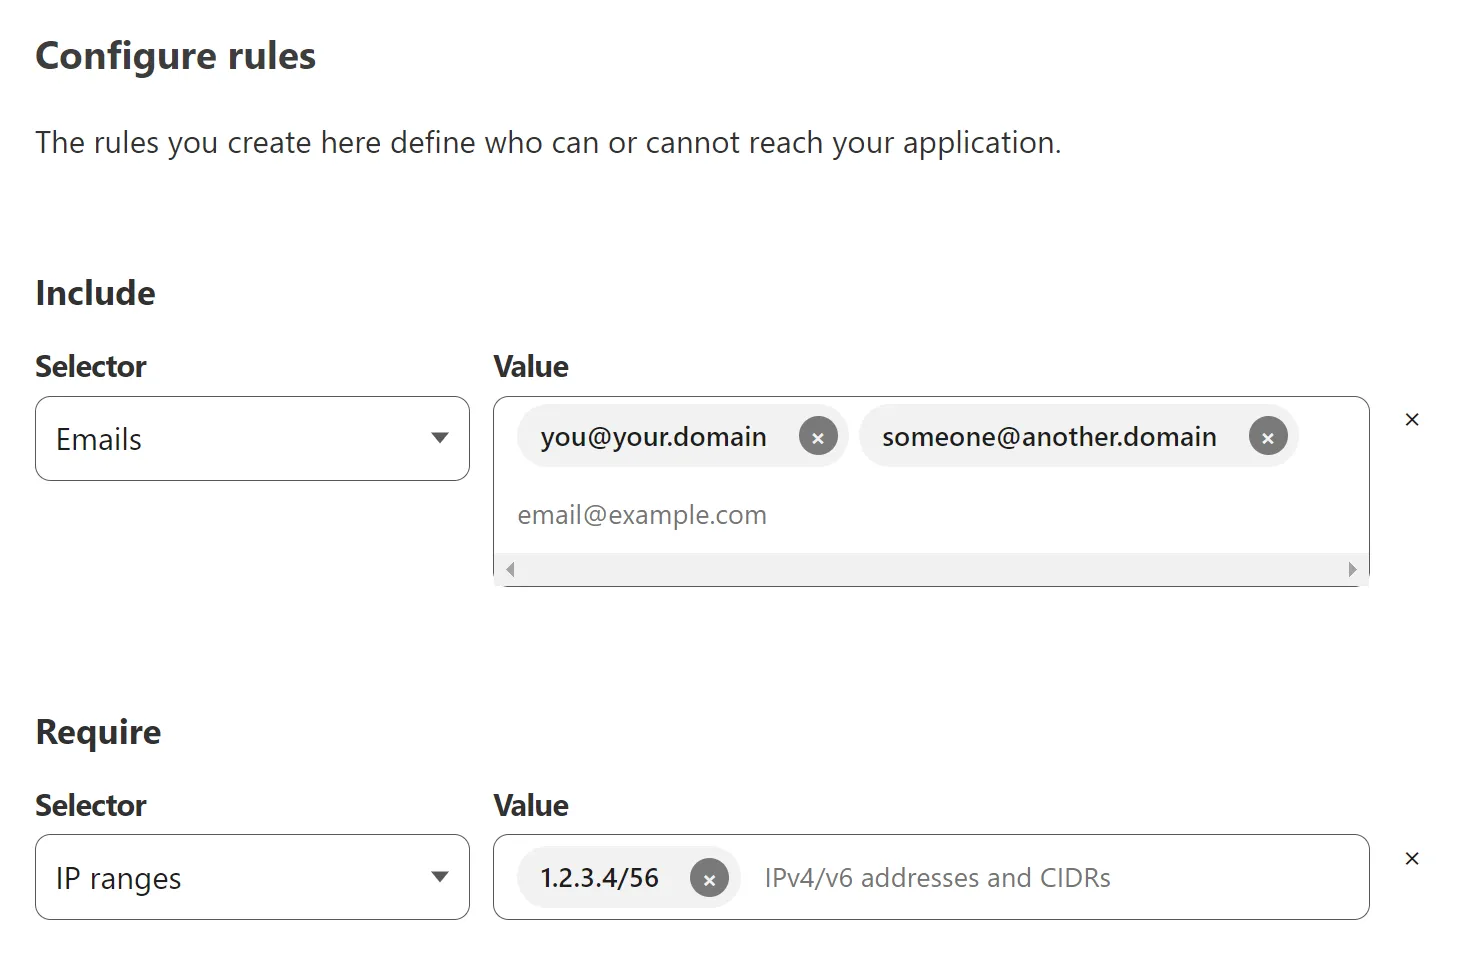
Adding multiple access policies for the same application can further refine the access restriction setup. You’ll find plenty details about access policies in the developer docs.
So, in conclusion…
I’m really happy with this end result. And once again I am very impressed with Cloudflare. Despite the docs being a little confusing, the whole thing was quite manageable once I started digging in.
This post has barely scratched the surface of what Cloudflare Access can do - let alone Cloudflare Zero Trust. I foresee a whole lot more experimenting with this platform 🤓
Happy hacking 💜